
This guide should be read in conjunction with the Robotis Mini Assembly Guide included with the Robotis Mini kit. It describes the additional steps involved in assembling an Edbot Mini.
|
These instructions reference the Robotis Mini Assembly Guide Revision 6, dated 15 Jan, 2019. |
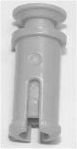
Page 7 of the Robotis Mini Assembly Guide introduces rivets and pins which are used to fasten the plates together. You'll need to assemble each rivet before use by clicking the pin into the rivet base.
|
It is very important to ensure the pin is inserted into the rivet in the correct orientation such that the lugs on the end of the pin are aligned with the slots in the rivet and the pin can freely slide inside the rivet with ease. Failure to align the pins correctly could mean they break or become loose and fall out when the Edbot Mini is in operation. |
When inserting a rivet, make sure the pin is not pushed into the rivet before use. If you need to remove a rivet, use the supplied rivet extraction tool.
The IR sensor (IRSS-10) provides a distance measurement that enables your Edbot Mini to react with its environment. Follow the instructions below to attach the sensor correctly during the assembly process.
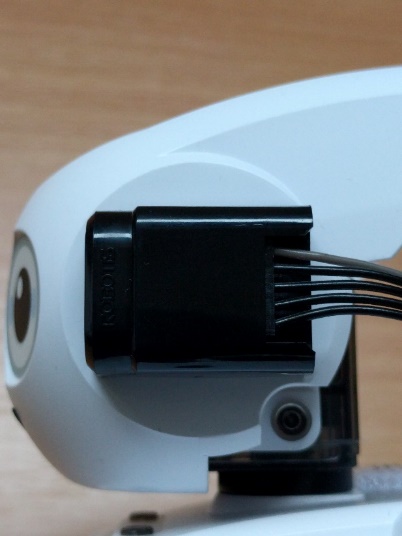
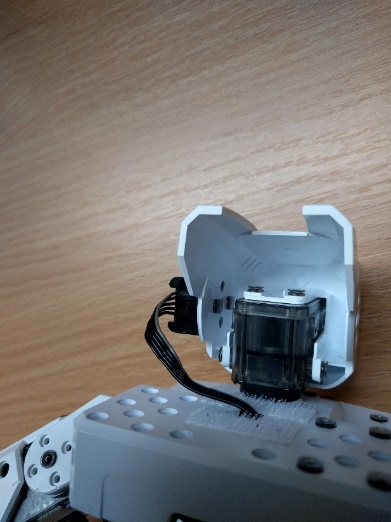
After completing step 61, go to step 67. Before starting attach the supplied IR ribbon cable to the IR sensor by firmly pushing the connector into the side of the sensor making sure the grey wire is at the top. Then attach the IR sensor to the head using 2 small rivets. Complete step 67 then thread the ribbon cable through the rectangular slot behind the dummy head servo.

Next complete step 68 then go back to step 62. In step 63, attach the Bluetooth module BT-210 to the opposite side to that shown in the diagram. Complete step 64 and additionally attach the IR sensor ribbon cable to port 1 on the microcontroller board ensuring the grey wire is furthest away from the on/off slider switch.
Complete steps 65 and 66 then continue from step 69.
Two battery chargers (LBB-041) are supplied separately. These battery chargers will accept the older LB-040 batteries in addition to the new LB-041 batteries. Remove the cable supplied with each battery charger and keep for spares.
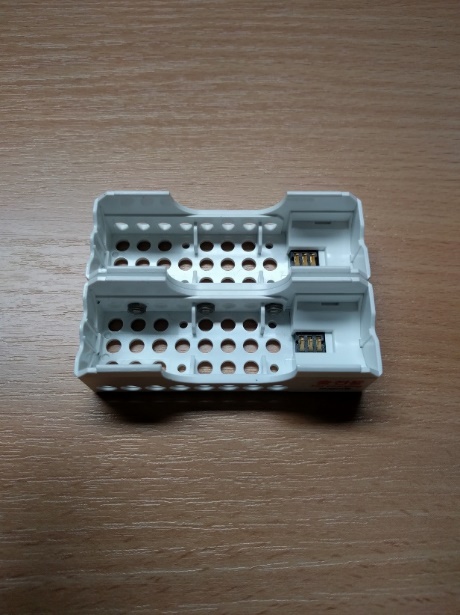
Assemble the battery charging cradle by joining the two chargers and securing them with three rivets as shown in the photo above. This will ensure the cradle fits snugly inside the compartment in the Edbot Mini case.
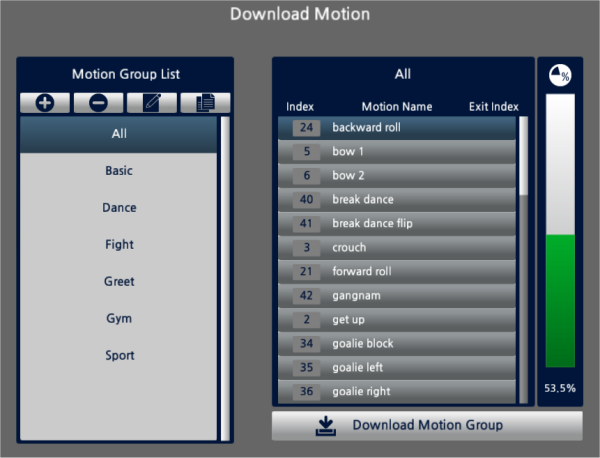
Use the Robotis R+ Motion 2.0 software to download the Edbot Mini motion file to the robot. R+ Motion 2.0 is free software and can be obtained from the Robotis Web site.
Instructions on how to download and use the software can be found in the R+ Motion 2.0 User Guide.
|
This Web links was correct at the time of writing. You may need to resort to Google if the link is broken. |
Download the Edbot Mini motion file.
Open the file in R+ Motion 2.0 and download the "All" motion group to the robot.
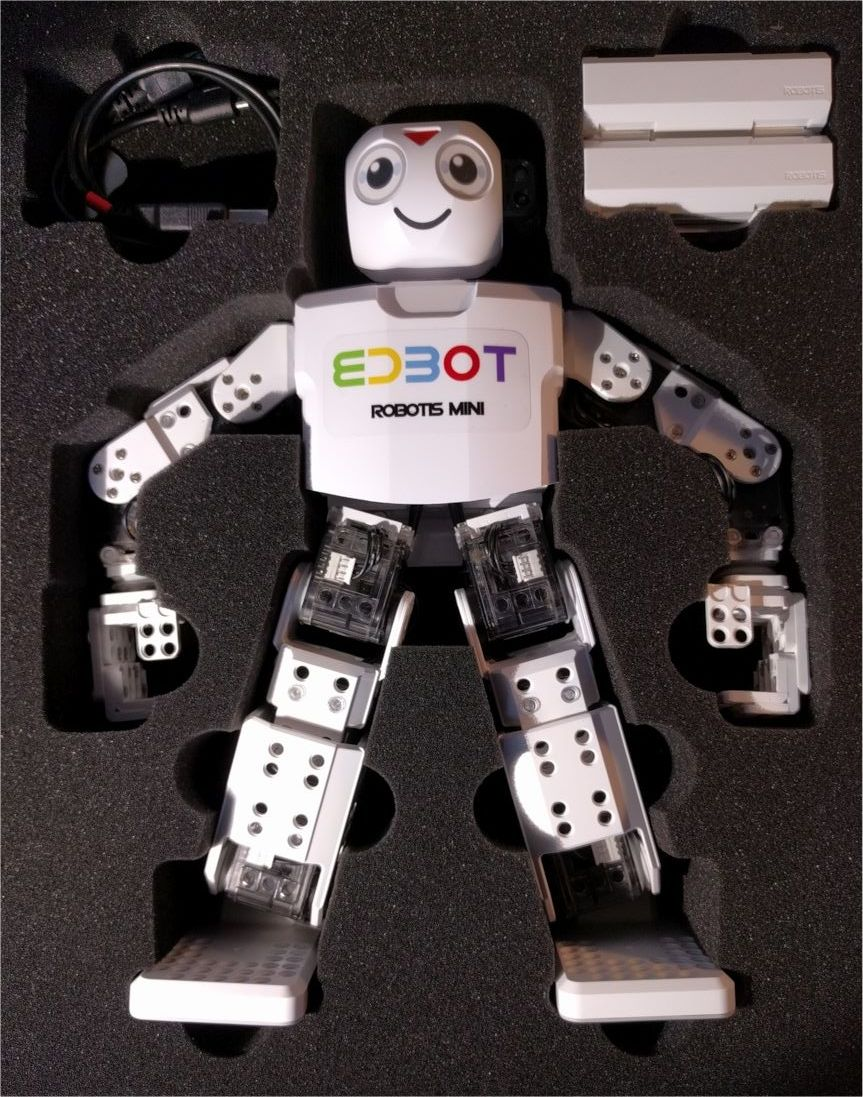
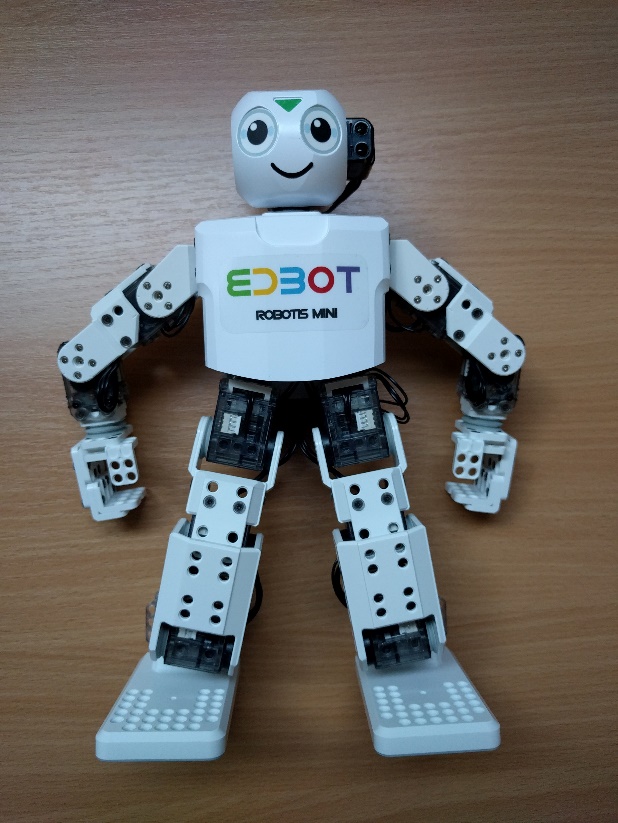
The following photos shows the placement of the Edbot Mini branding stickers. Select the eye stickers with the white circles in the top left as shown. Use a round smile for the mouth and attach a triangular sticker to the forehead. The Edbot Mini sticker should be positioned in the middle of the chest.
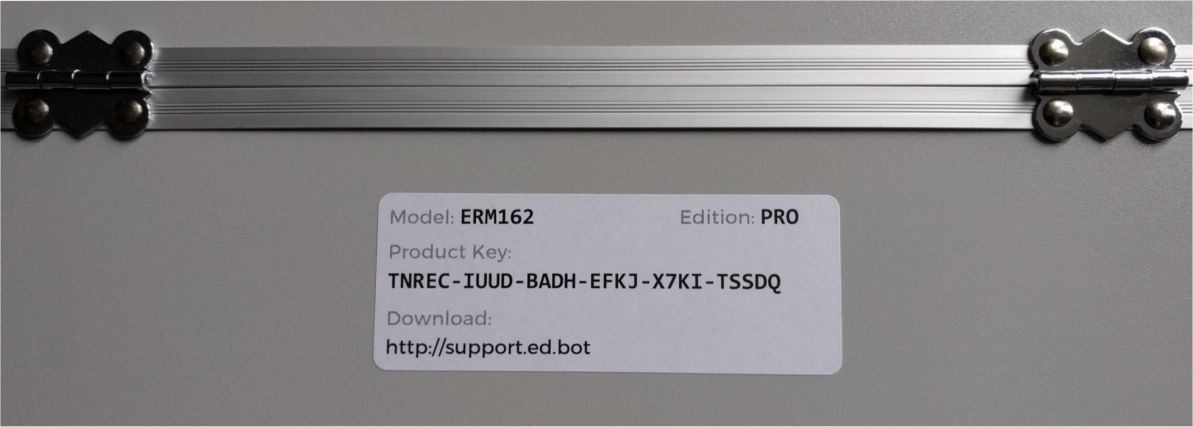
Affix the Product Key label to the bottom of the Edbot Mini case as shown.
Place the assembled Edbot Mini into the carry case. Use the left-hand compartment to store the USB splitter cable. Clip the spare batteries into the charger cradle and place it in the right-hand compartment. That's it. All done!