Documents\Edbot\java
Java is an object-oriented programming language developed by James Gosling and colleagues at Sun Microsystems in the early 1990s. The language syntax borrows heavily from C++ but has a simpler object model. Unlike conventional languages which are generally designed either to be compiled for a specific platform or interpreted from source code at runtime, Java is compiled to bytecode, which is then run by a platform-specific Java Virtual Machine (JVM). This promises write once, run anywhere code. The JVM provides a rich set of APIs to access the device’s hardware and services. For those areas not fully covered, such as Bluetooth, Java can be extended using the Java Native Interface (JNI). This framework enables Java to call native C++ code, although this will be at the expense of the 'write once, run anywhere' mantra.
|
It is important to note that Java is distinct from JavaScript. The two languages are completely different although parts of the syntax look similar. |
The Edbot Dream Java API enables a Java program to control your Edbot Dream robots. It is implemented as a set of thread-safe Java classes in the com.robotsinschools.edbot.client package.
This guide assumes you are familiar with writing Java code.
Unsurprisingly you’ll need to install the Java Development Kit (JDK). We recommend you use a free implementation of the OpenJDK such as Liberica JDK or AdoptOpenJDK. The java compiler is called javac and we’ll be running this from the command line to keep things simple. You can, of course, choose to use an integrated development environment (IDE).
Make sure you are running the latest version of the Edbot Software available from the download page. For the purposes of this guide we'll assume you've set up your Edbot server and you're running it locally. If the Edbot Software is running remotely, you'll need to change the localhost references to the name of the remote server.
The Java examples folder is part of the Edbot Software installation. In Windows the folder is located in your 'Documents' folder:
Documents\Edbot\javaSimilarly for macOS and Linux:
Documents/Edbot/javaThe folder should initially include the following files and folders:
jar/
  commons-io.jar
  commons-lang3.jar
  edbot-client.jar
  websocket.jar
DreamExample1.java
DreamExample2.java
The jar folder contains the JAR files which implement the API. The main JAR is called edbot-client.jar and the other JAR files are dependencies. Several examples using the API are included:
DreamExample1.java demonstrates simple blocking calls to the API.
DreamExample2.java shows a non-blocking example, useful for GUI programs.
We'll compile and run these programs later. The next section steps through the API basics, so read on.
Write your Java program using your preferred IDE or text editor.
First you'll need to import the Edbot classes into your program.
import com.robotsinschools.edbot.client.*;Next create an instance of the EdbotClient class. Without arguments, this will specify the Edbot server is running locally on the default port of 8080. You can use the API to connect to a remote Edbot server too, see the Reference section, but we'll stick to a server running locally for this guide.
EdbotClient ec = new EdbotClient("localhost", 8080);|
Your program should only create one instance of the EdbotClient class. |
Next connect to the Edbot server to send commands.
ec.connect();To receive data updates from the Edbot server, you'll need to create a class which implements the EdbotClientHandler interface. You then pass an instance of this class to the connect method. The example code below does this using an anonymous class. For more details consult the Reference section.
ec.connect(
  new EdbotClientHandler() {
    public void handle(Json message) {
      // Called when a message is received from the Edbot server.
    }
  }
);
The API makes heavy use of the Json class written by Borislav Iordanov. This is a lightweight Java JSON library with a very concise API. See mJson for more info. The mJson API documentation is an essential resource when coding.
After connecting to the Edbot server, your program will need control of the robot. Grant control using the active user menu in the Edbot Software. See below.
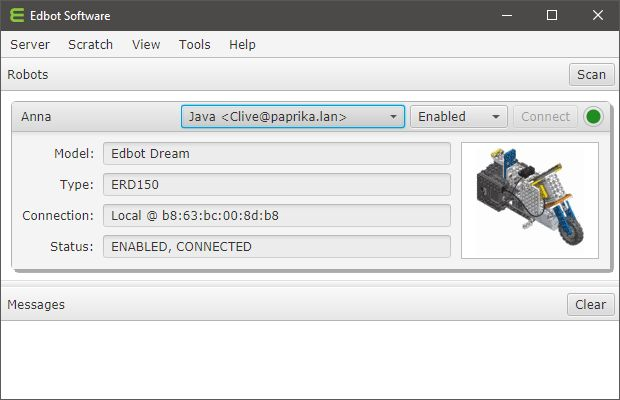
|
If you're developing solo, the Edbot Software provides a convenient per-robot option "Open access" in the Server → Setup → Configure window. This will allow any connection to control the robot. Check this option while developing so that you don't need to give control each time you test your program. To stop other network users inadvertently accessing the robot, uncheck the "Available on network" option. |
When you have successfully connected to the Edbot server you can send commands to your robot. For example to play buzzer melody 0, use:
ec.setBuzzer("Anna", "0/255")To turn on a motor plugged into port 1 at full speed, use:
ec.setServoSpeed("Anna", "1/100")and to turn it off:
ec.setServoSpeed("Anna", "1/0")You can control motors, servos, the built-in buzzer, an optional LED module, access built-in sensors and external sensors and even get your Edbot Dream to speak using the API methods detailed in the Reference section.
A call to getData() will return real time data as a Json object. The Json object gives access to lots of useful information you can use in your code. You can examine these values in real time using the Server → Monitor option in the Edbot Software. Here's what the values mean:
{
  "server": {                          # server information
      "version": "6.0.0.1661",
      "platform": "Windows 10, 10.0.17134.523, amd64"
  },
  "auth": "9TBvXvf9",                  # private session token
  "initComplete": true,                # true after connect() returns
  "robots": {
    "Anna": {                          # name of the robot
      "enabled": true,                 # enabled?
      "connected": true,               # Bluetooth connected?
      "reporters": {                   (1)
        ...
      },
      "activeUser": "Java...",         # currently active user
      "model": {                       # the robot model
          "name": "Edbot Dream",
          "type": "ERD150",
          "key": "dream"
      }
    }
  },
  "user": "Java <Clive@[192.168.1.24]:51144>",
  "users": [
    "Java <Clive@[192.168.1.24]:51144>",
    "Scratch 2.0 <Clive@[192.168.1.24]:0>",
  ]
}| 1 | The reporter object or null if not connected. |
The reporter properties provide real time data from the robot microcontroller.
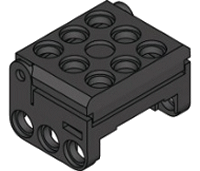
The Edbot Dream has 4 built-in sensors (3 IR sensors and a clap counter), an internal buzzer, 2 motor only ports and 2 ports to connect other external devices such as servos or sensors. You can obtain the raw values of the built-in sensors and external device ports from the following reporter properties:
"reporters": {
  "leftIR": 223,
  "centreIR": 14,
  "rightIR": 322,
  "clapCountLast": 0,
  "clapCountLive": 0,
  "port3": 580,
  "port4": 22,
  ...
}
You can use the API conversion methods such as rawToIRSS10Dist to convert raw sensor values to meaningful values.
The built-in microphone detects the number of claps (loud noises) that have occurred in the last few seconds. This is called the live count (clapCountLive). When silence is detected, the live count is transferred to the last count (clapCountLast) and the live count is set back to 0.
There are 3 internal IR sensors: left, right and centre. To convert a raw sensor value to centimetres use the rawToCM150Dist method.
|
The internal IR sensors are not the same as external IRSS-10 sensor described below, so be sure to use the correct conversion method. |
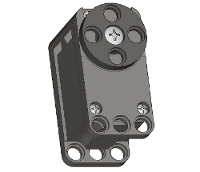
Edbot Dream is supplied with a servo (SM-10), the remaining sensors are optionally available. Contact us if you need to purchase them. Use the appropriate method in the table below to convert the raw value of the external ports (port 3 / port 4), depending on what is attached.
|
Servo position (SM-10) |
rawToSM10Angle |
|
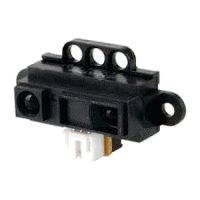
IR sensor (IRSS-10) |
rawToIRSS10Dist |
|
DMS sensor (DMS-80) |
rawToDMS80Dist |
|
Temperature sensor (TPS-10) |
rawToTPS10Temp |
|
Touch sensor (TS-10) |
rawToTPS10Touch |
|
Magnetic sensor (MGSS-10) |
rawToMGSS10Mag |
The speechCurrentWord reporter gives the current word as it is being spoken. The reporter is set to null when not speaking. It can be used to add visual emphasis during speech.
"reporters": {
  "speechCurrentWord": "Hello",
  ...
}|
The current word reporter is only available on Windows and Mac platforms. |
To build the examples, make sure you are in the Java examples folder and enter this command:
javac -cp "jar/*" *.javaAfter compilation you should see some class files in the folder. If you're on Windows, run the example by typing the appropriate line:
java -cp "jar/*;." DreamExample1
java -cp "jar/*;." DreamExample2
Similarly for macOS and Linux:
java -cp "jar/*:." DreamExample1
java -cp "jar/*:." DreamExample2Read through the first example. This program uses basic blocking calls to demonstrate simple use of the API.
Many of the API methods return a Json object which includes a return status and message. See the Reference section for the details.
import java.util.*;

import com.robotsinschools.edbot.client.*;

public class DreamExample1 {
  public static void main(String[] args) throws Exception {
    // Create an EdbotClient object.
    EdbotClient ec = new EdbotClient("localhost", 8080); (1)
    try {
      // Connect to the server.
      ec.connect(); (2)

      // Grab an unsorted list of available Edbot Dreams.
      String[] names = ec.getRobotNames("dream"); (3)
      if(names.length > 0) {
        // Display info for each Edbot Dream.
        for(String name : names) {
          System.out.println(name + ": " + ec.getRobot(name) + "\n");
        }

        // Wait for control of the first Edbot Dream in the list.
        String name = names[0]; (4)
        System.out.println("Waiting for control of " + name);
        ec.waitUntilActive(name); (5)

        // Say "Hello world". Block until finished.
        System.out.println("Testing speech: " + ec.say(name, "Hello world")); (6)

        // Play a melody.
        System.out.println("Playing melody: " + ec.setBuzzer(name, "0/255")); (7)
        Thread.sleep(1000);
      } else {
        System.out.println("No Edbot Dreams configured");
      }
    } finally {
      // Disconnect from the server.
      ec.disconnect(); (8)
    }
  }
}| 1 | Create a new EdbotClient instance. |
| 2 | Call the connect method. Return when connection initialised. |
| 3 | Build a list of configured Edbot Derams. |
| 4 | Select the first Edbot Dream. |
| 5 | Wait for control of the Edbot Dream. |
| 6 | Say "Hello world" and block until complete. |
| 7 | Play a melody when the speech has completed. |
| 8 | Disconnect. |
A more advanced example. We call a non-blocking version of the say() method after registering an event handler to play a melody when the speech has completed.
import java.util.*;

import com.robotsinschools.util.*;
import com.robotsinschools.edbot.client.*;

public class DreamExample2 {
  private static final int SEQUENCE = 1001;

  public static void main(String[] args) throws Exception {
    // Create an EdbotClient object.
    EdbotClient ec = new EdbotClient("localhost", 8080, "Java Example2"); (1)
    try {
      // Connect to the server.
      ec.connect( (2)
        new EdbotClientHandler() {
          public void handle(Json message) {
            // Called when a message is received from the Edbot server.
            try {
              Map<String, Json> robotMap = message.at("robots").asJsonMap();
              for(String name : robotMap.keySet()) {
                Json robot = robotMap.get(name);
                String token = robot
                  .at("reporters")
                  .at("speechComplete")
                  .asString()
                ;
                if(token.endsWith(String.valueOf(SEQUENCE))) {
                  // Finished speaking.
                  System.out.println(name + " has finished speaking");

                  // Play a melody.
                  ec.setBuzzer(name, "0/255"); (7)
                }
              }
            } catch(Exception ignore) {}
          }
        }
      );

      // Grab an unsorted list of configured Edbot Dreams.
      String[] names = ec.getRobotNames("dream"); (3)
      if(names.length > 0) {
        // Display info for each Edbot Dream.
        for(String name : names) {
          System.out.println(name + ": " + ec.getRobot(name) + "\n");
        }

        // Wait for control of the first Edbot Dream in the list.
        String name = names[0]; (4)
        System.out.println("Waiting for control of " + name);
        ec.waitUntilActive(name); (5)

        // Say "Hello world". Pass in a sequence number so we don't block.
        System.out.println(name + " is speaking");
        Json json = ec.say(name, "Hello world", SEQUENCE); (6)
        if(json.at("success").asBoolean()) {
          for(int i = 0; i < 5; i++) {
            System.out.println("Waiting... " + i);
            Thread.sleep(1000);
          }
        } else {
          System.out.println(json);
        }
      } else {
        System.out.println("No Edbot Dreams configured");
      }
    } finally {
      // Disconnect from the server.
      ec.disconnect(); (8)
    }
  }
}| 1 | Create a new EdbotClient instance. |
| 2 | Call the connect() method. Return when connection initialised. |
| 3 | Build a list of configured Edbot Dreams. |
| 4 | Select the first Edbot Dream. |
| 5 | Wait for control of the Edbot Dream. |
| 6 | The call to say() returns immediately. |
| 7 | Play a melody when the speech has completed. |
| 8 | Disconnect. |
The following classes are contained in the com.robotsinschools.edbot.client package.
The EdbotClient class contains methods to obtain sensor values and control the robot’s servos and microcontroller.
Create a new EdbotClient instance.
public EdbotClient()
public EdbotClient(String server)
public EdbotClient(String server, int port)
public EdbotClient(String server, int port, String client)
Parameters:
server |
The ip address or hostname of the Edbot server (default="localhost"). |
port |
The port number on which the server is running (default=8080). |
client |
Client description (default="Java"). |
Returns:
A new EdbotClient instance. |
Open a connection to the Edbot server.
public void connect()
public void connect(EdbotClientHandler handler)
Parameters:
handler |
An instance of a class implementing the EdbotClientHandler interface. |
Throws:
EdbotClientException |
If already connected to the server. |
Check if this client instance is connected to the Edbot server.
public boolean getConnected()Returns:
true if connected, otherwise false. |
Close the connection to the Edbot server. This method will initiate an orderly disconnection.
public void disconnect()Throws:
EdbotClientException |
If not connected to the server. |
Get an unsorted array containing the names of the robots on this server.
public String[] getRobotNames()
public String[] getRobotNames(String model)
Parameters:
model |
The model key to filter a specific type of robot. Currently defined keys are "edbot", "dream" and "play". |
Returns:
An array of robot names. |
Throws:
EdbotClientException |
If not connected to the server. |
Return the named robot as a Json object.
public Json getRobot(String name)Parameters:
name |
The name of the robot. |
Returns:
A Json object with the following properties:
model |
A Json object containing the robot model name, type and key. |
enabled |
true if the robot is enabled. |
connected |
true if the robot is connected via Bluetooth. |
activeUser |
The currently active user. null means open access. |
reporters |
A Json reporters object or null if not connected via Bluetooth. |
Throws:
EdbotClientException |
If not connected to the server. |
Return a Json object containing the Edbot server data.
public Json getData()Returns:
A Json object with the following properties:
robots |
A Json object representing the robots configured on the server. Each robot is keyed on name and its value is a Json robot object. |
initComplete |
If true the connection has finished initialising. |
server |
A Json object containing the server version and platform. |
auth |
A unique token allocated by the server used to identify this session. |
user |
The current user connection. |
users |
An Array of users connected to the server. |
Throws:
EdbotClientException |
If not connected to the server. |
Does this connection have control of the robot?
public boolean isActive(String name)Parameters:
name |
The name of the robot. |
Returns:
Returns true if the current user is active, otherwise false. |
Throws:
EdbotClientException |
If not connected to the server. |
|
You can retrieve the name of the currently active user using: |
Wait for control of the robot. This will block the current thread. See Waiting until active.
public void waitUntilActive(String name)Parameters:
name |
The name of the robot. |
Throws:
EdbotClientException |
If not connected to the server. |
Switch servos on or off.
public Json setServoTorque(String name, String path)Parameters
name |
The name of the robot. |
path |
A string formed by the servo number followed by "/" followed by 0 or 1 to turn the servo off or on respectively. Specify multiple servos by repeating the sequence, for example "1/0/2/0/3/1/4/1". Servo number 0 means all servos, so "0/0" will turn all servos off. |
Returns:
A Json object with boolean property success and string property message. |
Throws:
EdbotClientException |
If not connected to the server. |
Set the servo speed.
public Json setServoSpeed(String name, String path)Parameters
name |
The name of the robot. |
path |
A string formed by the servo number followed by "/" followed by the speed expressed as a percentage greater than zero. Specify multiple servos by repeating the sequence, for example "1/50/2/50/3/50/4/50". Servo number 0 means all servos, so "0/12.5" will set all servos to one eighth speed. |
Returns:
A Json object with boolean property success and string property message. |
Throws:
EdbotClientException |
If not connected to the server. |
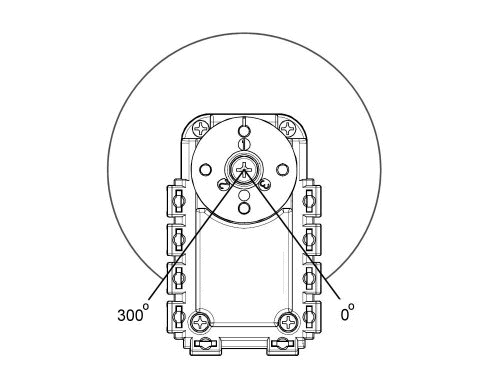
Set the servo position.
public Json setServoPosition(String name, String path)Parameters:
name |
The name of the robot. |
path |
A string formed by the servo number followed by "/" followed by the position which is an angle from 0 to 300 degrees.
Specify multiple servos by repeating the sequence, for example "1/250/2/50". |
Returns:
A Json object with boolean property success and string property message. |
Throws:
EdbotClientException |
If not connected to the server. |
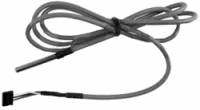
Your Edbot Dream is supplied with two motors (GM-10) and a servo (SM-10). Connect motors to port 1 / port 2 of the microcontroller using a 2-wire cable. You can control the motor speed and direction.
The servo connects to port 3 / port 4 using a 5-wire cable. By default the servo operates in wheel mode when it acts just like a motor. It can also operate in joint mode when you can set it to a specific position. If the servo is moving when you call this method, it will stop.
public Json setServoMode(String name, String path)Parameters:
name |
The name of the robot. |
path |
A string formed by the port number followed by "/" followed by 0 or 1 to set wheel mode or joint mode respectively. Specify multiple servos by repeating the sequence, for example "3/1/4/1". |
Returns:
A Json object with boolean property success and string property message. |
Throws:
EdbotClientException |
If not connected to the server. |
Play a note or built-in melody on the internal buzzer.
public Json setBuzzer(String name, String path)Parameters:
name |
The name of the robot. |
path |
To play a note, path should be a string formed by the pitch followed by "/" followed by the duration. The pitch is a number from 0 to 48 and the duration is from 3 to 50 in units of 0.1 seconds. To play a built-in melody, specify path as a melody index followed by "/" followed by 255. Melody indices range from 0 to 24. We use the term melody loosely here! |
Returns:
A Json object with boolean property success and string property message. |
Throws:
EdbotClientException |
If not connected to the server. |
This advanced method allows you to set a value in the microcontroller's control table.
public Json setCustom(String name, String path)A description of the control table can be found at the following link:
|
As an example you can use this method to turn on the green LED on the controller using a path of "79/1/1". |
Parameters:
name |
The name of the robot. |
path |
A string formed by the control table address (0 - 65535) followed by a "/" followed by the size in bytes (1 or 2) followed by "/" followed by the option value to write (0 - 255 if 1 byte : 0 - 65535 if 2 bytes). |
Returns:
A Json object with boolean property success and string property message. |
Throws:
EdbotClientException |
If not connected to the server. |
Set global options. These options are set to defaults when the robot is reset either by an explicit call to reset, or when the active user is changed on the Edbot server. Edbot Dream currently does not support any options.
public Json setOptions(String name, String path)Parameters:
name |
The name of the robot. |
path |
A string formed by the option name followed by "/" followed by the option value. Specify multiple options by repeating the sequence. |
Returns:
A Json object with boolean property success and string property message. |
Throws:
EdbotClientException |
If not connected to the server. |
Specify text for the robot to speak. This method assumes the robot has been configured with speech on the Edbot server. Unicode escapes are fully supported.
The first method will block the current thread until the speech has completed. The second will return immediately and append the passed in sequence number to the "speechComplete" reporter when the speech has completed. See DreamExample2.
public Json say(String name, String text)
public Json say(String name, String text, int seq)
Parameters:
name |
The name of the robot. |
text |
The text to speak. |
Returns:
A Json object with boolean property success and string property message. |
Throws:
EdbotClientException |
If not connected to the server. |
Reset the Edbot Dream. This will stop any connected motors or servos, turn off the LED module if plugged into port 3 / port 4, set the last clap count back to 0 and halt any speech on a word boundary and empty the request queue.
|
The servo speed settings are not reset due to limitatons in the firmware. |
public Json reset(String name)Parameters:
name |
The name of the robot. |
Returns:
A Json object with boolean property success and string property message. |
Throws:
EdbotClientException |
If not connected to the server. |
The EdbotClientHandler interface defines a single handle method. You can implement this interface in your own class and pass an instance to the connect method of the EdbotClient class. The handle method will then be called each time a message is received by the client. It will be passed a Json object representing the message.
public void handle(Json message)Parameters:
message |
The message received from the server. |
The EdbotClientException class represents a chainable exception thrown by a number of the Edbot Java API methods.
public EdbotClientException(String msg)
public EdbotClientException(Throwable t)
public EdbotClientException(String msg, Throwable t)
Parameters:
msg |
The detail message. |
t |
The cause. |
The SensorUtils class contains static utility methods to convert raw sensor values to the approriate units.
Convert the raw value from one of the three internal IR sensors to centimetres. The measuring range is 3cm to 20cm.
public static double rawToCM150Dist(int raw)Parameters:
raw |
integer |
The raw sensor reading in the range 0 - 1023. |
Returns:
Distance in centimetres rounded to 1 decimal place. |
The method returns 100.0 if the raw value is 0 (out of range).
The sensor was calibrated using the distance between the front edge of the feet and a vertical white A4 card. The card was held a known distance from the sensor and the raw sensor value was noted. This was repeated for different distances. A non-linear power curve was then used to fit the data points. Note the sensor readings will differ for different coloured objects placed the same distance away.
Convert the raw value from the SM-10 servo to an angle from 0 to 300 degrees, see setServoPosition.
public static double rawToSM10Angle(int raw)Parameters:
raw |
integer |
The raw sensor reading in the range 64 - 959. |
Returns:
Return the angle from 0 to 300 degrees rounded to 1 decimal place. |
Convert the raw value from the IRSS-10 IR sensor to centimetres. The measuring range is 3cm to 30cm.
public static double rawToIRSS10Dist(int raw)Parameters:
raw |
integer |
The raw sensor reading in the range 0 - 1023. |
Returns:
Distance in centimetres rounded to 1 decimal place. |
The method returns 100.0 if the raw value is 0 (out of range).
The sensor was calibrated using the distance between the front edge of the feet and a vertical white A4 card. The card was held a known distance from the sensor and the raw sensor value was noted. This was repeated for different distances. A non-linear power curve was then used to fit the data points. Note the sensor readings will differ for different coloured objects placed the same distance away.
Convert the raw value from the DMS-80 IR sensor to centimetres. The measuring range is 8cm to 80cm.
public static double rawToDMS80Dist(int raw)Parameters:
raw |
integer |
The raw sensor reading in the range 0 - 1023. |
Returns:
Distance in centimetres rounded to 1 decimal place. |
The method returns 100.0 if the raw value is 0 (out of range).
The sensor was calibrated using the distance between the front edge of the feet and a vertical white A4 card. The card was held a known distance from the sensor and the raw sensor value was noted. This was repeated for different distances. A non-linear power curve was then used to fit the data points.
Convert the raw value from the TPS-10 temperature sensor to degrees Celsius.
public static double rawToTPS10Temp(int raw)Parameters:
raw |
integer |
The raw sensor reading in the range 0 - 1023. |
Returns:
Temperature in degrees Celsius. |
Convert the raw value from the TS-10 micro-switch to 0 or 1.
public static int rawToTS10Touch(int raw)Parameters:
raw |
integer |
The raw sensor reading in the range 0 - 1023. |
Returns:
Return 1 if the switch is depressed, otherwise 0. |
Convert the raw value from the MGSS-10 reed switch to 0 or 1.
public static int rawToMGSS10Mag(int raw)Parameters:
raw |
integer |
The raw sensor reading in the range 0 - 1023. |
Returns:
Return 1 if a magnet is present, otherwise 0. |