
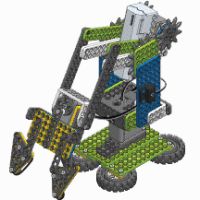
The robot arm. Use the keyboard to grab an item, move it and release it.
Before proceeding please make sure you've read the Edbot Dream Owner's Guide. This includes lots of useful information and some very important safety precautions. Following these safety precautions will keep you, your students and your Edbot Dream safe.
|
Download the assembly instructions. |
When you've finished building, you'll need to plug the Bluetooth module into the microcontroller. This will allow the Edbot Software to connect to the robot.
Make sure the Edbot Software is set up and running. Hold down the start button on the Edbot Dream microcontroller until the unit beeps twice. After a short time the robot should connect to the Edbot Software. Now it's time to code!
To get you going we provide the dream_robot_arm project for Scratch 2.0 and 3.0 created automatically when you generate the Scratch sample projects using the Edbot Software.
Place the robot arm on a flat surface and run the script. Use the up arrow and down arrow keys to lift the arm up and down. Use the left and right arrow keys to rotate the arm clockwise and anti-clockwise. Use the "a" and "d" keys to rotate the arm clockwise and anti-clockwise quickly. Use the "g" and "r" keys to grab and release an item. Enjoy!